There are many ways to remove DRM protection from iTunes music. On Windows OS, you can remove the DRM from iTunes music using the burn-and-rip method or you can turn to programs like
TuneClone and
DoubleTwist. On Mac OS X,
iMovie is the perfect solution to removing DRM from iTunes music. Besides, freewares like FairGame is also a pretty good choice. So this article is dedicated to introducing several methods of removing the nasty DRM from iTunes music on Windows and Mac OS X. It is divided into the following four parts:
Part 1. Remove DRM from iTunes music on Windows with burn-and-rip method
Part 2. Remove DRM from iTunes music on Windows with TuneClone
Part 3. Remove DRM from iTunes music on Mac OS X with iMovie
Part 4. Remove DRM from iTunes music on Mac OS X with FairGamePart 1. Remove DRM from iTunes music on Windows with burn-and-rip methodA. Insert a CD-R or CD-RW disc into your CD-ROM drive. You'd better use CD-RW disc as it can be used for more than once.
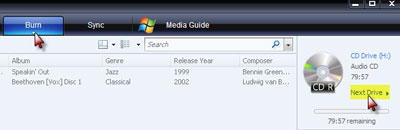
B. Burn your playlist to make an audio CD. You cannot select the "MP3 CD" option since it requires the protected music files be converted to unprotected MP3 files.
C. After the audio CD is successfully burned, insert the disc into your CD-ROM drive again. Then you can use iTunes or Windows Media Player to import the music tracks on the burned disc to MP3 files.
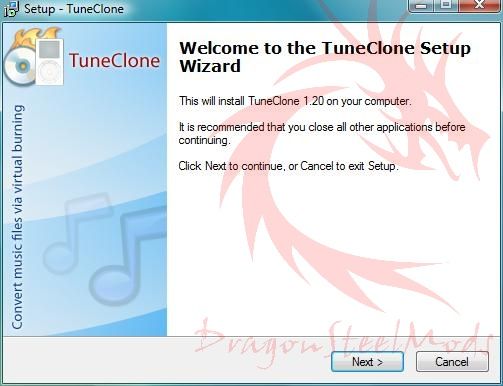
Part 2. Remove DRM from iTunes music on Windows with TuneCloneA. Download
TuneClone from
http://www.tuneclone.com/ and install it.
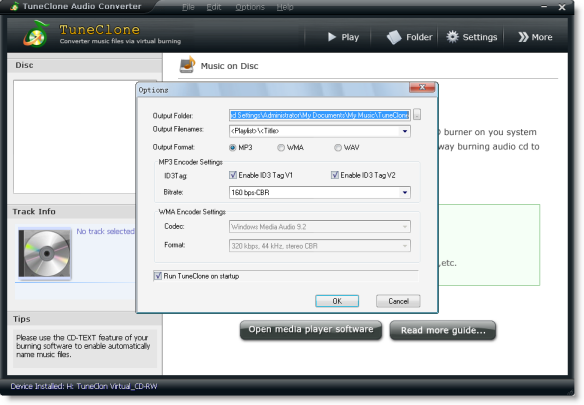
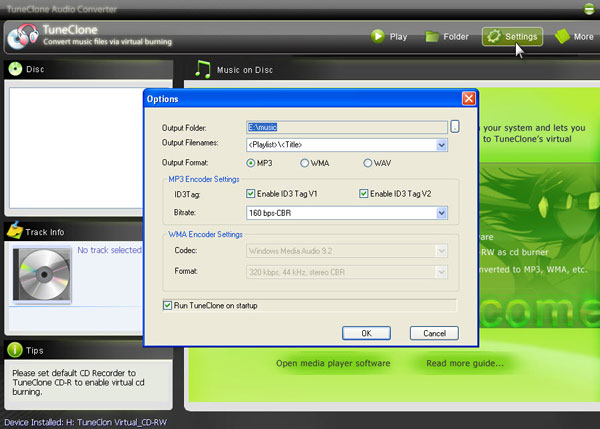
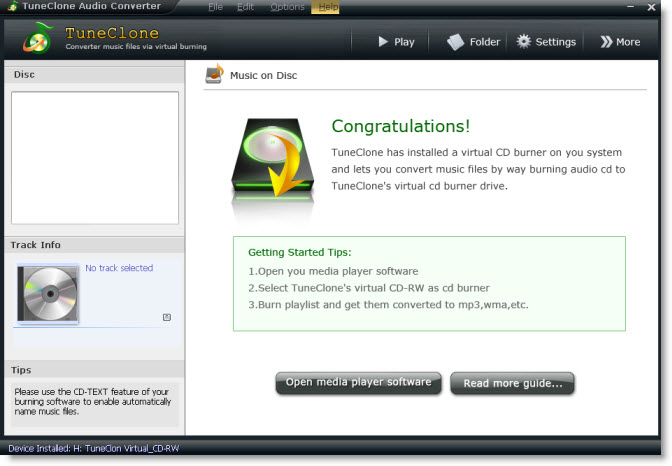
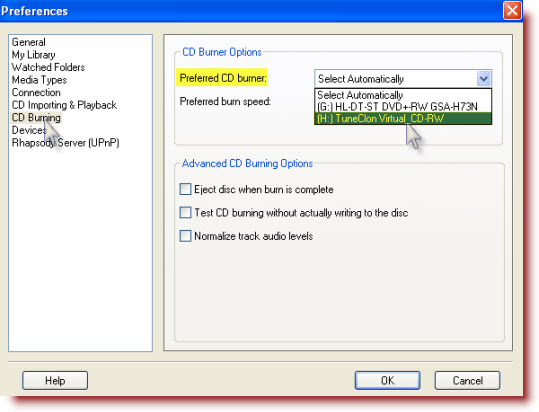
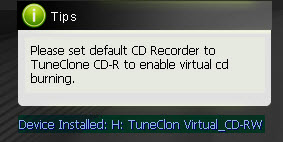
TuneClone is fully compatible with Windows XP and Windows Vista. A virtual CD burner will be installed. This virtual CD-RW will be used to convert music files.
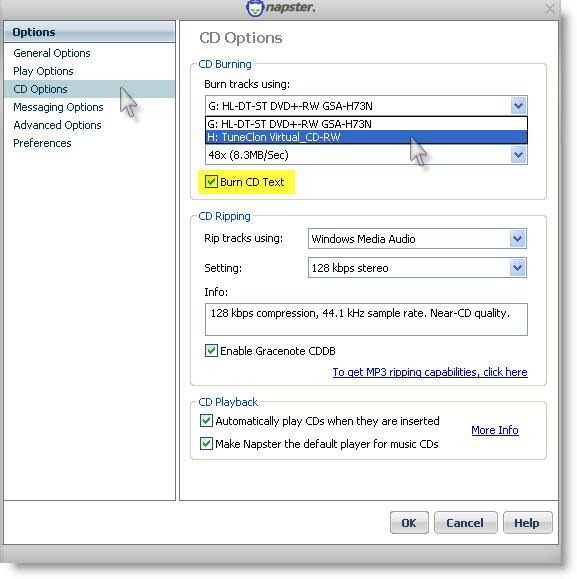
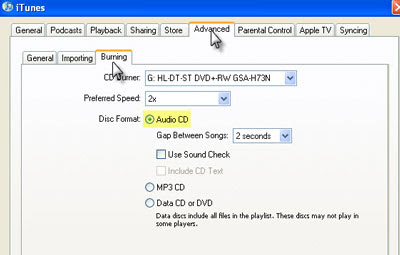
B. Set the default CD burner to TuneClone virtual CD-RW at iTunes.
Click menu "Edit", select menu item "Preferences...", and then select "Advanced Tab". In order to keep the music information about artist, title, etc., the "Include CD Text" option should be checked.
Note: If you are using iTunes 8.0 or above, please skip to this guide about
how to remove DRM from iTunes 8 music.
 C.
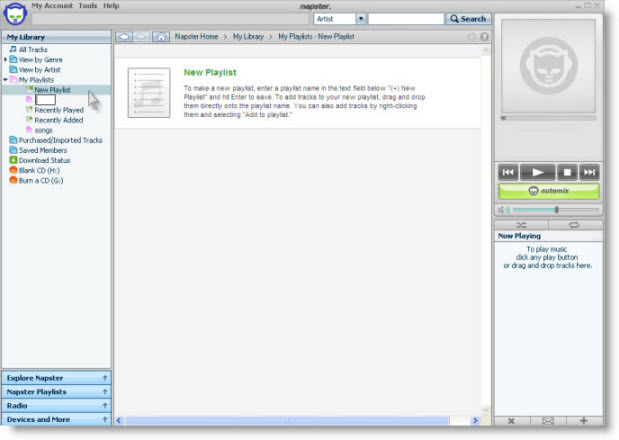
C. Create a playlist, and then add the files you want to convert into the playlist.
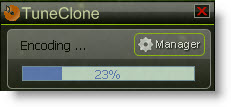
D. Click "Burn Disc" button at the bottom right of the main screen of iTunes.
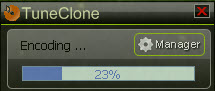
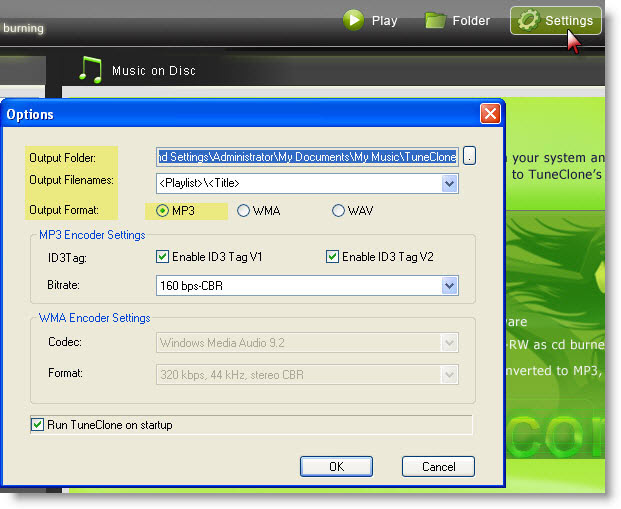
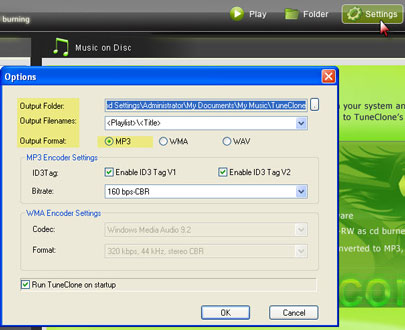
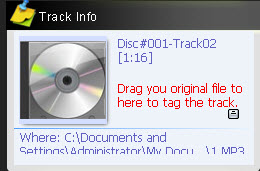
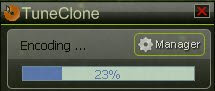
While the burning gets started, TuneClone will automatically convert the music file to MP3, WMA or WAV. You can open the manager screen to show all the converted music files.
The most important step is to choose the cd burner. Then the software can convert the music files automatically. It is exceedingly easy when you want to batch convert lots of files.
Part 3. Remove DRM from iTunes music on Mac OS X with iMovie
In the iMovie window, select the 'Media' tab located between 'Themes' and 'Editing'. You will notice that the top right portion of the interface now offers a media browser. Select the 'Audio' tab and locate the playlist which contains purchased music, or search by artist/title.


Select the DRM-laden song and drag the file from the media browser into the iMovie timeline where it says "Drag audio here to build your project."

In order to export the song, iMovie requires that a visual image be associated with the audio track -
iMovie thinks that it is going to be exporting a movie. Simply drag a blank image (or any other image) to the track above the previously imported audio file. Once iMovie has processed the image, select the 'Share…' sub menu item from found inside 'Share' in iMovie's menu bar.

Ensure that 'Expert Settings' is selected in the "Compress movie for:" drop-down menu. Selecting 'Expert Settings' mode will provide the options to export the file as an audio file. Select the 'Share' button.
In the Save as… dialogue, select "Sound to AIFF" in the Export drop-down menu, Choose an appropriate directory for iMovie to export to, title the file, and select 'Save'. Depending on your machine configuration, iMovie will compress and export the movie project as an audio file in 15-40 seconds.

Locate the exported AIFF audio file and drag to your iTunes Library. Right-click on the file and select "Convert Selection to AAC". Once completed, 'Get Info' on the new file, edit meta data, add album art, and trash the originally purchased and AIFF audio files from your iTunes library.
Part 4. Remove DRM from iTunes music on Mac OS X with FairGameFairGame is freeware to remove DRM protection from iTunes music on Mac OS X. It will convert the DRMed songs you bought on the iTunes Store to an unprotected format (using iTunes default encoder) and keep all the original metadata, lyrics and artwork. FairGame doesn't do lossless DRM stripping. It re-encodes protected AAC files purchased in iTMS into unprotected AAC file using Apple's iMovie software.

What you MUST DO (only once) to get FairGame to work:
- Enable "Access for assistive devices" in the "Universal Access" system preference
- Select "Place clip in Movie Timeline" in the "Import" preference of iMovie HD
Then you can simply:
- Select some songs in iTunes
- Click on the "Process songs" button
Don't touch anything and wait until it's done...(FairGame is scripting iMovie's interface to process the songs, don't interfere)