The tools you will need:
TuneClone Audio Converter
Napster Software
iPod
iTunes Library
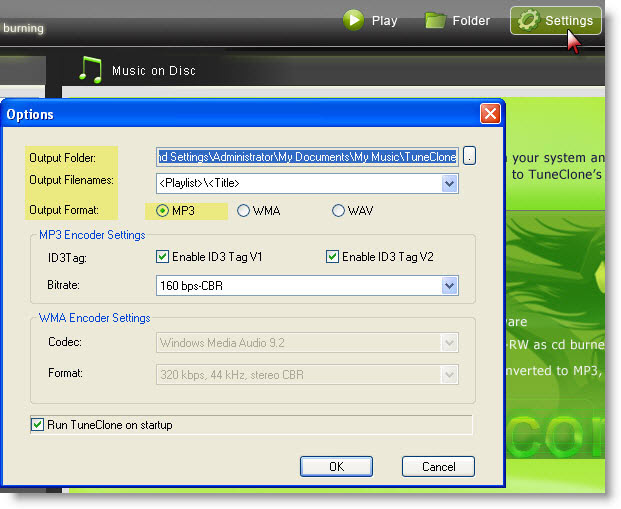
1. Make settings in TuneClone Audio Converter
Download TuneClone (fully compatible with Windows XP and Windows Vista) from http://www.tuneclone.com/index.php and install it. After launching TuneClone, click the "Settings" button. In the pop-up dialog of "Options", you can specify the "Output Folder", "Output Filenames", "Output Format" (here we choose MP3), etc. for the output files.
Tip: You can get the output protection removed MP3 music folder by clicking the "Folder" button after the whole process.
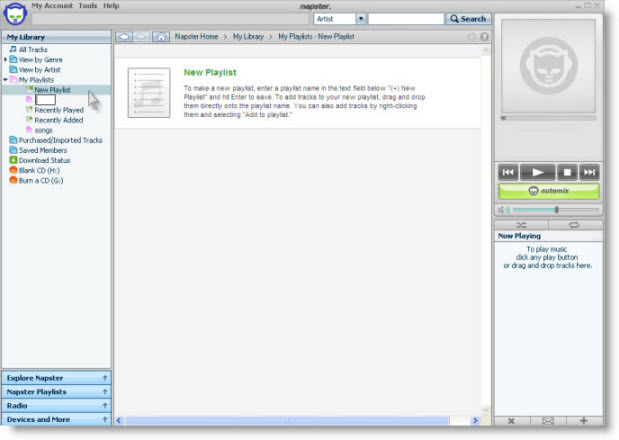
2. Create a new playlist in Napster
Under "My Playlist", click the "New Playlist" button to create a new playlist. Drag and drop to the playlist the music you are going to burn from your Napster Library.
3. Make CD burning settings in Napster
Click "Tools", and select "Preference..." from the drop-down list. In the left panel of "Options", navigate to "CD Options". In the right panel of "CD Options", choose TuneClone virtual CD drive as the preferred CD burner.
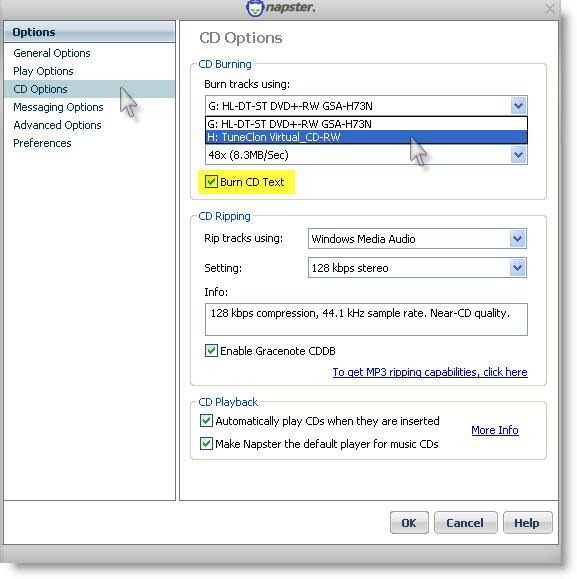
Note: Please tick "Burn CD Text" to preserve the metadata of the music.
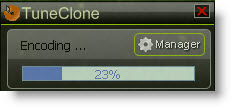
4. Start to burn
Click the "Burn Disk" button to start the burning and encoding process.
After the burning gets started, TuneClone will automatically convert the music file to MP3. You can open the manager screen to show all the converted music files.
The most important step is to choose the CD burner. Then the software can convert the music files automatically. It is exceedingly easy when you want to batch convert lots of files.
After you get the output MP3 files converted from the Napster music playlist in your Napster, you can now begin to transfer the MP3 files to your iPod with the sync of iTunes.
No comments:
Post a Comment