Below are the detailed tutorial about how to burn RealPlayer music to MP3 using TuneClone's virtual CD burner:
1. Download TuneClone from http://www.tuneclone.com/index.php and install it.
TuneClone is fully compatible with Windows XP, Vista. A virtual CD burner will be installed. This virtual CD-RW will be used to convert music files.
2. Launch RealPlayer and Click the "Burn/Transfer" button. Change the "Current Burner/Device" to "Audio CD Burner".
Click the "Edit Options..." button and you will see the dialogue window below:
Click the "Advanced Options..." button. In the following dialogue window, change the default CD burner to "TuneClon Virtual_CD-RW".
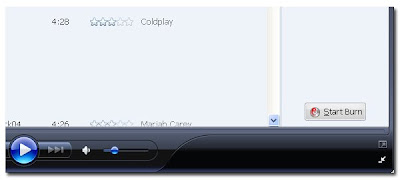
Step 4. Start burning
Back to the main screen, add music files to the list and click "Burn Your CD" button.
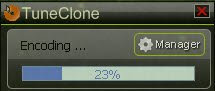
After the burning gets started, TuneClone will automatically convert the music file to MP3. You can open the manager screen to show all the converted music files.
The most important step is to choose the CD burner. Then the software can convert the music files automatically. It is exceedingly easy when you want to batch convert lots of files.