The music downloaded from iTunes is under DRM protection. In order to play it on your PSP, you need to strip the DRM off and have the iTunes M4P M4A converted to PSP MP3 format. You can burn the protected M4P music files to CD-R or CD-RW disc to make an audio CD and then use some CD ripper software to convert the audio CD track back to PSP MP3. Also iTunes allows you to burn the protected music files to CD-R or CD-RW disc to make a standard audio CD:
1. Insert a CD-R or CD-RW disc into your CD-ROM drive. You'd better use CD-RW disc as it can be used for more than once.
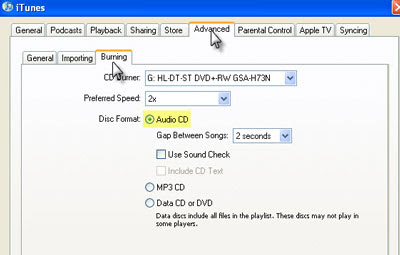
2. Create a new playlist in iTunes. Add the protected songs to your playlist until you have 72 minutes of music. Click Edit and select Preferences. Select the Advanced tab. Tick the Audio CD option on the Burning tab. Click the Burn Disc button to make an audio CD.
Note: You cannot select the MP3 CD option since it requires the protected music files be converted to unprotected MP3 files.
3. After the audio CD is successfully burned, insert the disc into your CD-ROM drive again. Then you can use iTunes or Windows Media Player to import the music tracks on the burned disc to MP3 files.
Sounds a good idea! But it would be a time consuming process if you have a library of iTunes M4P music files ready to be converted to PSP MP3 for playback on your PSP. And it is a waste of CD discs. Moreover, the information about the M4P music files like title, artist and album will be lost after burning and ripping back to MP3 or WMA files. So this method is not recommended if you have a big collection of iTunes M4P music files ready to be transferred to your PSP.
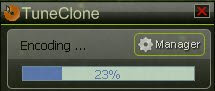
Here, I would recommend using TuneClone M4P to MP3 Converter to convert iTunes M4P to PSP MP3. It applys the virtual CD burning technology to simulates the burning and ripping process. You just need to burn the iTunes M4P playlist to TuneClone virtual CD burner. Then TuneClone will directly convert the iTunes M4P music list to PSP MP3 for you. It is very fast and the information about each music song will be preserved perfectly. You can follow its the step by step tutorial to learn how to convert iTunes DRM protected M4P music to MP3 for PSP.
After getting the output MP3 files by adopting either the burn-and-rip method or the way of using TuneClone M4P to MP3 Converter, now you can begin to transfer the MP3 files to your PSP:
1) Connect the PSP to your PC with a USB cable.
2) Press the "home" button on the PSP (it's a tiny button to the lower left of the screen) then use the left-right directional buttons to find "Settings", then the up-down buttons to find "USB Connection" on the PSP.
3) Press the "X" button (you got it, the round button with the "X" on it) and your PSP should display "USB Connection".
4) In a moment or two your computer should tell you that a new USB device has been connected, then show you a new generic hard drive, usually E: or F:
5) Click on the drive letter that corresponds to the PSP unit.
6) Now create a new folder on that drive and name it "psp".
7) Within the new "psp" folder create another folder, and name it "music".
8) Copy your desired mp3 files into the new "music" folder.
9) When you're done copying your desired music tracks, press the "O" button on the PSP to get out of USB connect mode.
Now you're ready to go! Use the left-right arrows to move to the music area, then the up-down arrows to find "Memory Stick". Choose that folder by pressing the "X" button again, and you should be able to find all your favorite music!
2 comments:
I am fond of TuneClone as it applies the virtual cd burning tech. it helps to speed up the conversion process. Also no real disc required.
You can also use TuneClone M4P Converter to convert iTunes M4P to WAV and WMA. It is very easy to complete the burning (in iTunes 8 ) and encoding (in TuneClone) process. You only need to choose TuneClone virtual CD drive as the CD burner in iTunes. The best two parts are: A) well preserves the ID3 tags information; B) works great for batch converting iTunes playlist.
http://www.m4p-wav.com
Post a Comment