Showing posts with label m4p to mp3. Show all posts

Tuesday, January 10, 2012

Transfer iTunes songs to non-Apple music player or mobile phone

I have a little Sansa mp3 player, but my mom has an iPod. I have been downloading music from the iTunes store, but I can't put them on my player. I realize that the songs from iTunes are .mpeg files (or something like that) and that my music player plays .mp3 files, but is there any way that I could work around this, or possibly convert my .mpeg files?

My iPod broke, so I want to buy a new mp3 player, but I was thinking that this time I might try a different brand because iPods are usually a little more on the expensive side. But I still have all my iTunes songs i already bought and was wondering if it was a huge hassle to transfer them to something else and if it might be worth it to spend the extra money on the apple brand..
The songs you purchased from iTunes store are DRM protected. In order to transfer iTunes songs to a non-Apple music player or mobile phone, you will need to get the iTunes music converted first.

If you have a blank CD disc at hand and there are not many songs that need to be converted, you can try this way:
  1. Insert the blank CD into your computer disc drive.
  2. Create a new playlist in iTunes and add songs to the playlist.
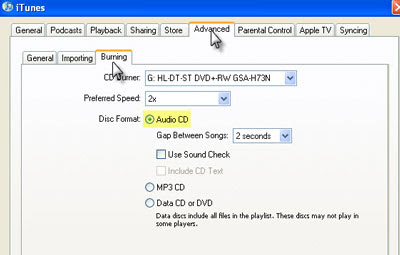
  3. Burn the playlist to the CD (choose Audio CD in the Burn Settings window).
  4. Rip the burned CD back as MP3 files in iTunes or Windows Media Player.
Then you can transfer the MP3 files to your non-Apple music player or mobile phone.

What if you have lots of songs (say 1000+) that need to be converted? You still use the above burn-and-rip method? You know, a real CD disc can only hold about 79-min music. If the average length of each song is 4 minutes, then the total length would be 4000+ minutes. And you will need more than 50 discs for burning. What a waste of money! What's more, it is a waste of efforts to insert and eject CD discs again and again. So it is inadvisable to convert a large library of iTunes music using this method.

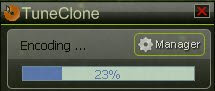
The software TuneClone also adopts the burn-and-rip method. However, TuneClone cleverly avoids the problem by applying the virtual CD burning technology. The conversion theory of TuneClone is very simple. It installs a virtual CD drive to users' computers. Then while burning iTunes playlists to an audio CD, you just choose the TuneClone virtual CD drive instead of a real CD disc. So you have saved the cost of real CD discs.

Besides, TuneClone automatically detects whether the length of the playlist exceeds 79 min. If so, it will ask you whether or not to burn multiple audio CDs. After you choose Audio CDs, the burning and encoding process will get started and TuneClone will automatically divide the playlist into several folders. You can actually switch to other jobs before the conversion is completed. So you have saved time as well.

TuneClone virtual CD drive

Thursday, May 26, 2011

TuneClone Audio Converter for Mac 1.4.0 Released to Unlock iTunes Music

TuneClone Inc. released the newest version of TuneClone Audio Converter for Mac. This Mac M4P to MP3 Converter has been upgraded to version 1.4.0. The latest version of TuneClone Audio Converter for Mac has added German and Japanese interface.

TuneClone Audio Converter for Mac is the best iTunes music DRM removal software. It is used to convert iTunes music m4a to mp3, aac to mp3 and m4p to mp3 and convert iTunes audiobook m4b to mp3 on Mac OS X. This iTunes music converter enables you to unlock iTunes music with ease and speed.

TuneClone Audio Converter for Mac simulates the process of burning a CD disc in iTunes and ripping it back. It applies the virtual CD burning technology to remove DRM protection from iTunes music. All you need to do is burn the playlist in your iTunes library to TuneClone's Virtual CD Drive. TuneClone will automatically convert the music songs in the playlist to plain MP3 files.

Key Features of TuneClone Audio Converter for Mac V1.4.0

1. Remove DRM protection from iTunes music .m4p and iTunes audiobook .m4b;

2. Convert iTunes music m4a, aac, m4p to mp3, wma or wav for playback on all sorts of media players like PSP, BlackBerry, Creative Zen, iriver, Walkman, Mobile Phone, etc.;

3. Convert music files using the virtual CD burning technology, which adopts the maximum writing speed so that your music files can be converted at a very high speed;

4. Fully preserve ID3 tags such as artist, album, title names and artworks;

5. Work great for batch converting a large collection of music files;

6. Easy to install and use with a very handy and clear user interface;

7. Fully support iTunes 10.

What's New in TuneClone Audio Converter for Mac V1.4.0

1. Added German and Japanese interface;
2. Fixed several bugs about ID3 tags;
3. Fixed several other bugs.

Availablility, Upgrade and Price

TuneClone Audio Converter for Mac V1.4.0 is available at http://mac.tuneclone.com . It works with Intel based Mac OS X 10.5 or above, including Mac OS X 10.5 Leopard and Mac OS X 10.6 Snow Leopard. To upgrade the program, you just go to our official website and then download and install the latest version. The upgrade is totally free, while the full version of TuneClone Audio Converter for Mac V1.4.0 costs USD34.95.

Monday, May 16, 2011

TuneClone Audio Converter V2.00 Released to Work with 64bit Windows 7 and Vista

TuneClone Inc. released the newest version of TuneClone Audio Converter for Windows. This iTunes music converter has been upgraded to version 2.00. Now, it is fully compatible with 64bit Windows Vista and Windows 7.

TuneClone Audio Converter is the best iTunes music conversion and iTunes music DRM removal software. It is used to convert iTunes music m4a to mp3, aac to mp3 and m4p to mp3 and convert iTunes audiobook m4b to mp3. This iTunes music converter enables you to unlock iTunes music so that you can enjoy iTunes music beyond Apple environment.

TuneClone Audio Converter simulates the process of burning a CD disc using iTunes and then ripping it back. It applies the virtual CD burning technology. All you need to do is burn the playlist in your iTunes library to TuneClone's Virtual CD Drive. TuneClone will automatically convert the music songs in the playlist to mp3, wma or wav files.

Key Features of TuneClone Audio Converter V2.00

1. Remove DRM protection from iTunes music .m4p and iTunes audiobook .m4b;

2. Remove DRM from purchased or protected music from Windows Media Player, RealPlayer, WinAMP, Napster, Rhapster, etc.;

3. Convert iTunes music m4a, aac, m4p to mp3, wma or wav for playback on all sorts of media players like Zune, PSP, BlackBerry, Creative Zen, iriver, Walkman, etc.;

4. Convert music files using the virtual CD burning technology, which adopts the maximum writing speed so that your music files can be converted at a very high speed;

5. Fully preserve ID3 tags such as artist, album, title names and artworks;

6. Work great for batch converting a large collection of music files.

What's New in TuneClone Audio Converter V2.00

1. Compatible with 64bit Windows Vista and Windows 7;
2. Fixed several bugs about ID3 tags;
3. Fixed several other bugs.

Availablility, Upgrade and Price

TuneClone Audio Converter V2.00 is available at www.tuneclone.com. It is compatible with Windows XP, Windows Vista 32/64 bit, Windows 7 32/64 bit. To upgrade the program, you just go to our official website and then download and install the latest version. The upgrade is totally free, while the full version of TuneClone Audio Converter V2.00 costs USD34.95.

Thursday, December 30, 2010

Sync iTunes music m4p with Windows Phone 7

"I have 5.81 GB (approximately 1200 songs) in my iTunes. How do I transfer ALL of those songs to my Windows Phone 7? I want EVERY song I have in my iTunes on my Windows Phone 7. What is the best way to go about this?"

If you want to play iTunes music M4P, M4A, AAC on your Windows Phone 7, you just need to use some software to convert iTunes music to Windows Phone 7 compatible format and then transfer the output files to your Windows Phone 7. The following guide is going to show you how to remove DRM copy protection from iTunes music, convert DRM iTunes music M4P to MP3, M4A to MP3, AAC to MP3 and sync iTunes music to Windows Phone 7 using TuneClone Audio Converter.

iTunes music to Windows Phone 7

1. Create a new playlist in iTunes.

2. Add the iTunes songs to the playlist.

3. Launch TuneClone Audio Converter. Click the "Settings" tab. In the pop-up window, you can specify output folder, output file name format, output format, etc for the output files. Note: You can check whether TuneClone virtual CD drive is successfully installed and where it is installed at the bottom left corner of the interface.

iTunes music to Windows Phone 7

4. Switch to iTunes. In iTunes, Right click the playlist you just created and choose "Burn Playlist to Disc".

5. In the pop-up window of "Burn Settings", select "TuneClon Virtual_CD-RW" from the "CD Burner" drop-down list, click the radio button next to "Audio CD" and tick "Include CD Text" option. Click "Burn" to start burning.

iTunes music to Windows Phone 7

6. Upon the completion of burning the disc and encoding the music, you can open the TuneClone manager screen to show all the converted music files. To locate the output folder, simply click the "Folder" tab on the interface.

After you get the output music files, connect your Windows Phone 7 to computer via the USB cable, drag and drop the converted music to the music folder, then you can play the iTunes M4P music on your Windows Phone 7 at ease.

Tuesday, September 15, 2009

Transfer iTunes M4P to Zune HD

This guide is going to show you how to remove DRM protection from iTunes music, convert DRM protected iTunes M4P to MP3, M4A to MP3, AAC to MP3 and transfer iTunes music to Zune HD. First, let's take a look at the video/audio formats Zune HD accepts:

Video Support:
WMV
MPEG-4 (MP4/M4V) (.mp4) Part 2 video
H.264 video
DVR-MS

Audio Support:
Windows Media® Audio Standard (WMA) (.wma)
WMA Lossless
Advanced Audio Coding (AAC) (.mp4, .m4a, .m4b, .mov): .m4a and .m4b files without FairPlay DRM
MP3 (.mp3)

So, if you want to play DRM protected iTunes M4P, M4A, AAC music on your Zune HD, you just need to use TuneClone Audio Converter to convert the iTunes music to MP3 format and then transfer the output MP3 to your Zune HD.

Now let's take a look at how it performs to convert the iTunes music to MP3 format for Zune HD using TuneClone Audio Converter:

1. Create a new playlist in iTunes.

2. Add the iTunes songs to the playlist.

3. Launch TuneClone Audio Converter. Click the "Settings" tab. In the pop-up window, you can specify output folder, output file name format, output format, etc for the output files. Note: You can check whether TuneClone virtual CD drive is successfully installed and where it is installed at the bottom left corner of the interface.

iTunes to Zune HD

4. Switch to iTunes. In iTunes, select the playlist you just created and click the "Burn Disc" button.

5. In the pop-up window of "Burn Settings", select "TuneClon Virtual_CD-RW" from the "CD Burner" drop-down list, click the radio button next to "Audio CD" and tick "Include CD Text" option. Click "Burn" to start burning.

iTunes to Zune HD

6. Upon the completion of burning the disc and encoding the music, you can open the TuneClone manager screen to show all the converted music files. To locate the output folder, simply click the "Folder" tab on the interface.

7. After you get the output music files, connect your Zune HD to computer via the USB cable, drag and drop the converted MP3 files to the Zune Software, then you can sync the iTunes M4P music to Zune HD with the help of Zune Software at ease.

Extracted from http://www.tuneclone.com/transfer-itunes-music-to-zune-hd.php

Monday, July 20, 2009

M4A to MP3 Converter - convert iTunes M4A AAC M4P M4B AA to MP3

TuneClone M4A to MP3 Converter is a DRM remover for converting M4A to MP3 for playback on non-Apple MP3/MP4 players and mobile phone players including Zune, PSP, PS3, BlackBerry, Creative Zen, iriver, Walkman, Pocket PC, Xbox, Nokia, LG, Motorola, Sony Ericsson, Google Phone, etc.

Q: Why Use M4A to MP3 converter?

A: When you purchase music from iTunes Store, they are actually DRM protected content (protected AAC or say M4P) and you will not be able to play the protected AAC (M4P) files on MP3 players which do not support their formats. In such case, the option is to Burn those tracks to a CD and then Rip them once again to the computer hard drive wherein the DRM will be removed and you will get the tracks in (DRM free) MP3 format. After this you will be able to transfer them to a memory card or to most MP3 players.

In case you have purchased a great amount of music from iTunes Store, you can go ahead and use M4A to MP3 Converter which acts as a Virtual CD-ROM drive on your PC, and lets you remove the DRM element without having to waste actual CD's.

Step by Step: Convert M4A to MP3, AAC to MP3, M4B to MP3, M4P to MP3, iTunes to MP3, AA to MP3

Step 1. Download and install M4A to MP3 Converter. Run it. In the main interface, click the "Settings" button. In the pop up window, you can choose the output folder, output file name format, output format (actually you can choose MP3, WMA or WAV), etc for the output files.

m4a to mp3 converter - convert m4a to mp3

Step 2. Create a new playlist in iTunes and add the M4A/AAC/M4B/M4P/iTunes/AA files to the playlist.

Step 3. In iTunes, select the playlist and click the "Burn Disc" button. In the pop-up window of "Burn Settings", select "TuneClon Virtual_CD-RW" from the "CD Burner" drop-down list, click the radio button next to "Audio CD" and tick "Include CD Text" option. Click "Burn" to start burning. Note: You can check whether TuneClone virtual CD drive is successfully installed and where it is installed in the bottom left corner of the TuneClone interface.

m4a to mp3 converter - convert m4a to mp3

Step 4. Upon the completion of burning the disc and encoding the music, you can open the TuneClone manager screen to show all the converted music files. To locate the output folder, simply click the "Folder" tab on the interface.

Wednesday, July 15, 2009

Play iTunes M4P on BlackBerry Tour 9630

"The BlackBerry Tour 9630 itself is really a mash-up of RIM's BlackBerry Bold, BlackBerry Curve 8900 and BlackBerry Storm."

One of the greatest new features I am starting to enjoy on my BlackBerry Tour is the ability for it to play multimedia files and specifically audio (music).

First let's take a look at the video and audio formats supported by the newest BlackBerry Tour 9630:

Video format support: MPEG4 H.263, MPEG4 Part 2 Simple Profile, H.264 (encoding and decoding 30fps), WMV

Audio format support: MP3, AAC, AAC+, eAAC+, WMA, WMA ProPlus

Basically, when you purchase music from iTunes Store, you actually get DRM protected content (in protected AAC or M4P format), which you will not be able to play on MP3/MP4 players and other non-Apple mobile players. In such case, the option is to burn those tracks to an audio CD and then rip them once again to your computer hard drive wherein the DRM will be removed and you will get the tracks in (DRM free) MP3 format. After this you will be able to transfer them to your BlackBerry.

In case you have purchased a great amount of music from iTunes Store, you can go ahead and use TuneClone M4P to MP3 Converter which acts as a Virtual CD-ROM drive on your PC and lets you remove the DRM element without having to waste actual CD's, with the music ID3 tags info well preserved.

You can follow this tutorial to learn how to convert iTunes M4P to MP3 for your BlackBerry using TuneClone M4P to MP3 Converter:

How to Convert iTunes M4P to MP3?


After you get the output MP3 files, you can now begin to transfer them to your BlackBerry Tour:

1. Connect your BlackBerry to you computer via the USB cable.
2. If you have properly enabled your Blackberry as a Mass Storage Device, your Blackberry's microSD card will show as a removable drive on your computer.
3. Double click on the Blackberry folder.
4. Double click on the music folder.
5. Copy your music files to your BlackBerry.
6. Disconnect your Blackberry from the USB cable and go to the "Multimedia" icon on you Blackberry. You need to disconnect when you use the Mass Storage device method as it disables direct access from the BlackBerry when connected to the PC via the USB cable.
7. Click on the Music icon.
8. Click on the Media Card folder.
9. Select your Music folder.
10. Select your Song.
11. Play and enjoy.

Done.

Monday, July 06, 2009

How to convert iTunes M4P to MP3 for Zune PSP BlackBerry

When you purchase music from iTunes Store, you actually get DRM protected content (in protected AAC or M4P format), which you will not be able to play on MP3/MP4 players and other non-Apple mobile players. You cannot directly transfer the M4P files to Zune, PSP, BlackBerry, either. In such case, the option is to burn those tracks to an audio CD and then rip them once again to your computer hard drive wherein the DRM will be removed and you will get the tracks in (DRM free) MP3 format. After this you will be able to transfer them to Zune, PSP, BlackBerry.

In case you have purchased a great amount of music from iTunes Store, you can go ahead and use TuneClone M4P to MP3 Converter which acts as a Virtual CD-ROM drive on your PC and lets you remove the DRM element without having to waste actual CD's, with the music ID3 tags info well preserved. Below is the detailed steps:

Step 1. Create a new playlist in iTunes and add the M4P songs to the playlist.

Step 2. Download and install TuneClone M4P to MP3 Converter. Run it. In the main interface, click the "Settings" button. In the pop up window, you can choose the output folder, output file name format, output format (choose MP3 here), etc for the output files.

convert iTunes M4P to MP3 for Zune PSP BlackBerry

Step 3. Back to iTunes. Click the "Burn Disc" button. In the pop-up window of "Burn Settings", select "TuneClon Virtual_CD-RW" from the "CD Burner" drop-down list, click the radio button next to "Audio CD" and tick "Include CD Text" option. Click "Burn" to start burning. Note: You can check whether TuneClone virtual CD drive is successfully installed and where it is installed in the bottom left corner of the TuneClone interface.

convert iTunes M4P to MP3 for Zune PSP BlackBerry

Step 4. Upon the completion of burning the disc and encoding the music, you can open the TuneClone manager screen to show all the converted music files. To locate the output folder, simply click the "Folder" tab on the interface.

P.S. Burn and Rip iTunes M4P to MP3 for Zune PSP BlackBerry

1. Insert a CD-R or CD-RW disc into your CD-ROM drive.

2. Burn the iTunes M4P playlist to make an audio CD. You cannot select the "MP3 CD" option since it requires the DRM protected iTunes M4P files be converted to MP3 or WMA files for Zune, PSP, BlackBerry.

3. After the audio CD is successfully burned, insert the disc into your CD-ROM drive again. Then you can use iTunes or Windows Media Player to import the music tracks on the burned disc as MP3 or WMA files.

Thursday, June 18, 2009

AAC to MP3 Converter - Convert iTunes AAC M4A M4P to MP3

AAC to MP3 Converter is a DRM removal for converting iTunes to MP3, AAC to MP3, M4A to MP3, M4P to MP3 for playback on non-Apple MP3/MP4 players and mobile phone players including Zune, PSP, PS3, BlackBerry, Creative Zen, iriver, Walkman, Pocket PC, Xbox, Nokia, LG, Motorola, Sony Ericsson, Google Phone, etc.

Q: Why Use AAC to MP3 converter?

A: When you purchase music from iTunes Store, they are actually DRM protected content and you will not be able to play the protected AAC (M4P) files on MP3 players which do not support their formats. In such case, the option is to Burn those tracks to a CD and then Rip them once again to the computer hard drive wherein the DRM will be removed and you will get the tracks in (DRM free) MP3 format. After this you will be able to transfer them to a memory card or to MP3/MP4 players.

In case you have purchased a great amount of music from iTunes Store, you can go ahead and use AAC to MP3 Converter which acts as a Virtual CD-ROM drive on your PC, and lets you remove the DRM element without having to waste actual CD's.

How to: Convert iTunes AAC M4A M4P to MP3 Using AAC to MP3 Converter?

Step 1. Create a new playlist in iTunes and add the iTunes/AAC/M4A/M4P songs to the playlist.

Step 2. Download and install AAC to MP3 Converter. Run it. In the main interface, click the "Settings" button. In the pop up window, you can choose the output folder, output file name format, output format (actually you can choose MP3, WMA or WAV), etc for the output files.

aac to mp3 converter - convert aac to mp3

Step 3. Back to iTunes. Click the "Burn Disc" button. In the pop-up window of "Burn Settings", select "TuneClon Virtual_CD-RW" from the "CD Burner" drop-down list, click the radio button next to "Audio CD" and tick "Include CD Text" option. Click "Burn" to start burning. Note: You can check whether TuneClone virtual CD drive is successfully installed and where it is installed in the bottom left corner of the TuneClone interface.

aac to mp3 converter - convert aac to mp3

Step 4. Upon the completion of burning the disc and encoding the music, you can open the TuneClone manager screen to show all the converted music files. To locate the output folder, simply click the "Folder" tab on the interface.

Thursday, April 09, 2009

M4P converter - convert M4P to MP3 WAV WMA

Are you annoyed by iTunes DRM? Do you want to remove it because you want to play the iTunes music on non-Apple MP3 players like PSP, Zune, Creative Zen, BlackBerry, PS3, iriver, Walkman, mobile phone MP3 player, etc, use it as background music in a home video, or anything else that DRM limits it to do? Many people know you can remove the DRM from iTunes music by simply burning the song to a CD, and ripping it back over, losing very little quality (if settings are correct):

1. Insert a CD-R or CD-RW disc into your CD-ROM drive.
2. Burn your playlist to make an audio CD. You cannot select the "MP3 CD" option since it requires the DRM protected iTunes music files be converted to unprotected MP3, WMA or WAV files.
3. After the audio CD is successfully burned, insert the disc into your CD-ROM drive again. Then you can use iTunes to import the music tracks on the burned disc as MP3, WMA or WAV files.

And the method I am going to introduce does the same exact thing but you will not need a CD-RW disc, a CD ROM drive, or even need to burn anything! It's that simple. Let's show you how to perform this.

We are going to be using a program called TuneClone M4P Converter. TuneClone M4P Converter is basically a program that acts as a virtual CD drive that allows you "burn" MP3 from iTunes and "rip" it. TuneClone "lies" to your computer saying that you have a CD-RW drive that it will burn to (like Alchohol 120%). You can use this to move your library of M4P DRM protected music to the MP3 format that you can use on any player out there worth its salt. This is a useful tool for anyone looking to break their relationship with the iPod. The best part is that it maintains all of the music file's metadata. Below is the step by step tutorial that shows how it works:


  1. Create a new playlist in iTunes.

  2. Add the protected songs to your playlist. Since iTunes burns the protected music with TuneClone virtual CD drive, there is no limit as to music length so long as you have enough hard drive space.

  3. Launch TuneClone M4P Converter. Click the "Settings" tab. In the pop-up window, you can specify output folder, output file name format, output format (WMA, MP3, WAV), etc for the output files. Note: You can check whether TuneClone virtual CD drive is successfully installed and where it is installed in the bottom left corner of the interface.


  4. In iTunes, click the "Burn Disc" button.

  5. In the pop-up window of "Burn Settings", select "TuneClon Virtual_CD-RW" from the "CD Burner" drop-down list, click the radio button next to "Audio CD" and tick "Include CD Text" option. Click "Burn" to start burning.


  6. Upon the completion of burning the disc and encoding the music, you can open the TuneClone manager screen to show all the converted music files. To locate the output folder, simply click the "Folder" tab on the interface.

Monday, December 22, 2008

How to remove iTunes DRM from protected AAC M4P M4B

Are you annoyed by iTunes DRM? Do you want to remove it because you want to play the iTunes music on non-Apple MP3 players like PSP, Zune, Creative Zen, BlackBerry, PS3, iriver, Walkman, mobile phone MP3 player, etc., use it as background music in a home video, or anything else that DRM limits it to do? Many people know you can remove the DRM from iTunes music by simply burning the song to a CD, and ripping it back over, losing very little quality(if settings are correct):

1. Insert a CD-R or CD-RW disc into your CD-ROM drive. You'd better use CD-RW disc as it can be used for more than once.
2. Burn your playlist to make an audio CD. You cannot select the MP3 CD option since it requires the encrypted iTunes music files be converted to unprotected MP3 files.
3. After the audio CD is successfully burned, insert the disc into your CD-ROM drive again. Then you can use iTunes to import the music tracks on the burned disc to MP3 files.

And the method I am going to introduce does the same exact thing but you will not need a CD-RW disc, a CD ROM drive, or even need to burn anything! It's that simple. Let's show you how to perform this.

We are going to be using a program called TuneClone. TuneClone is basically a program that acts as a virtual CD drive that allows you "burn" MP3 from iTunes and "rip" it. TuneClone "lies" to your computer saying that you have a CD-RW drive that it will burn to (like Alchohol 120%). You can use this to move your library of M4P DRM protected music to the MP3 format that you can use on any player out there worth its salt. This is a useful tool for anyone looking to break their relationship with the iPod. The best part is that it maintains all of the music file's metadata. Below is the step by step tutorial that shows how it works:

1. Download TuneClone from http://www.tuneclone.com and install it.

TuneClone is fully compatible with Windows XP and Windows Vista. A virtual CD Burner will be installed. This virtual CD-RW will be used to convert music files.

2. Make settings at TuneClone

Convert protected AAC/M4P to MP3

Click the Settings button at TuneClone. In the pop-up window, you can specify the output folder, output filenames, output format, etc. for the output files.

Note: Apart from MP3, TuneClone also allows you to convert iTunes M4P to WAV and unprotected WMA.
Tip: You can get the output protection removed music folder by clicking the Folder button after the whole process.

3. Make settings at iTunes(iTunes 8 )

Create a playlist, and then add the files you want to convert into the playlist.

Create a new playlist in iTunes 8

After you have created the playlist ready to be burnt, click the Burn Disc in the bottom right of iTunes.

In the pop up window of Burn Settings, make the settings as highlighted below:

Burn Settings at iTunes 8

4. Start to burn

Click the Burn button to start burning.

After the burning gets started, TuneClone will automatically convert the music file to MP3, WMA or WAV. You can open the manager screen to show all the converted music files.

TuneClone Burning

The most important step is to choose the CD burner. Then the software can convert the music files automatically. It is exceedingly easy when you want to batch convert lots of files.

Monday, December 15, 2008

TuneClone V1.30 - remove DRM from iTunes M4P M4B WMA Napster using virtual CD drive

The newest version of TuneClone - TuneClone V1.30 - was released on December 15,2008!

TuneClone Audio Converter is a powerful yet easy to use DRM remover and music converter program for removing DRM from iTunes music, Windows Media Player music, RealPlayer music, WinAMP music, Napster music, Rhapsody music, etc., with the music metadata well preserved.


Unlike other media converters, TuneClone Audio Converter applies the virtual CD burning technology to remove the DRM. It generates a virtual CD-ROM drive, tricking your PC into believing that you are burning a CD. Therefore, the DRM is removed without wasting a CD.

TuneClone Audio Converter can be used to convert iTunes protected AAC (M4P), M4B, M4A, protected WMA to MP3, WAV and unprotected WMA. It removes the DRM from protected iTunes M4P or protected WMA so as to help you play the DRM-laden music on media players or MP3 players like Microsoft Zune, Sony PSP, BlackBerry, Creative Zune, iriver, SanDisk Sansa, Sony Walkman, Cell Phone(Sony Ericsson, Motorola, Nokia N-series, Samsung Anycall, LG, etc.) Pocket PC, PDA and so on.

Key features of TuneClone V1.30: (from http://www.tuneclone.com)

1. Easy to install and easy to use via a simple user interface.

2. Remove DRM from purchased or protected music from iTunes, Windows Media Player, RealPlayer, WinAMP, Napster, Rhapster, etc, using automatically generated virtual CD drive.

3. Convert DRM protected music to plain MP3 format for playback on all kinds of MP3 players or media players like Zune, PSP, BlackBerry, Creative Zen, iriver, Walkman, etc.

4. Remove DRM from purchased music files by applying the virtual CD burning technology, which adopts the maximum writing speed so that your music files can be converted at a very high speed.

5. Convert iTunes protected AAC (M4P), M4B and M4A to MP3, WAV and WMA.

6. Convert protected WMA (Windows Media Audio) to MP3, WAV and unprotected WMA.

7. Well Preserve ID3 tags for artist, album, title names, artworks, etc.

8. The converted songs will have no DRM restriction any more.

Availability, price and support

More information about TuneClone V1.30 is available at http://www.tuneclone.com/index.php. You can free download TuneClone V1.30 from http://www.tuneclone.com/tuneclone_setup.exe for a try.

The full version of TuneClone V1.30 costs USD34.95.

If you have questions about or show interest in TuneClone V1.30, please feel free to contact TuneClone support team via support@tuneclone.com.

Sunday, November 02, 2008

How to play iTunes protected AAC (M4P) music on PS3?

"Can I play iTunes (that I have stored on my computer) on my PS3? I know I can't just hook up my iPod to it or stream from my PC. I read something about transferring music to USB and then put that flash drive in the PS3, will this work? I want to play my iTunes on my home theater but I have no other way than to play it through my PS3. I have a yamaha 5990 receiver and it is not iPod compatible. Any options here? Thanks in advance."

As the music in iTunes is encrypted with DRM, you cannot directly transfer it to your PS3. The easiest way is to burn the music to an audio CD and then rip it back to Windows Media Player or a similar program as an MP3.

Or you can get some software to help you. TuneClone is a pretty good program to get the iTunes protected AAC (M4P) music burned to MP3.


And this page demonstrates how to remove DRM from iTunes music and convert iTunes DRM protected AAC (M4P) music to MP3 for Sony PlayStation 3(PS3) using these two methods:

1. Burn an audio CD and rip it back to MP3
2. TuneClone

And below is the tutorial page:
http://www.tuneclone.com/how-to-import-itunes-music-to-playstation3.php

So now you can listen to iTunes music while playing games with your PS3.

Friday, September 26, 2008

How to Convert iTunes 8 M4P to MP3

More than two months ago, I wrote a tutorial entitled How to Convert iTunes M4P to MP3. In that post, I introduced the way to convert iTunes M4P (protected AAC) music to MP3: using TuneClone. With the release of Apple genius iTunes 8, this way of converting iTunes M4P (protected AAC) music to MP3 with TuneClone isn't applicable, as there's some difference between iTunes 8 and its previous version. So, I'd like to post the step by step tutorial about how to convert iTunes 8 protected AAC or say M4P music to MP3 with TuneClone below:

1. Download TuneClone from http://www.tuneclone.com/tuneclone_setup.exe and install it.

TuneClone is fully compatible with Windows XP and Windows Vista. A virtual CD burner will be installed. This virtual CD-RW will be used to convert music files.

2. Make settings in TuneClone

Convert M4P to MP3

Click the "Settings" button at TuneClone. In the pop-up window, you can specify the "output folder", "output filenames", "output format", etc. for the output files.

Note: Apart from MP3, TuneClone also allows you to convert iTunes M4P to WAV and unprotected WMA.
Tip: You can get the output protection removed music folder by clicking the "Folder" button after the whole process.

3. Make settings at iTunes

Create a playlist, and then add the files you want to convert into the playlist.

convert iTunes to MP3

After you have created the playlist ready to be burnt, click the "Burn Disc" in the bottom right of iTunes.

In the pop up window of "Burn Settings", make the settings as highlighted below:

convert M4P to MP3

4. Start to burn

Click the "Burn" button to start burning.

After the burning gets started, TuneClone will automatically convert the music file to MP3, WMA or WAV. You can open the manager screen to show all the converted music files.

M4P converter

The most important step is to choose the CD burner. Then the software can convert the music files automatically. It is exceedingly easy when you want to batch convert lots of files.

Sunday, September 07, 2008

TuneClone V1.20 Free Download

TuneClone V1.20 was released on September 3, 2008!

Free download TuneClone V1.20

TuneClone V1.20 is a powerful DRM cracker and music converter for unlocking iTunes DRMed M4P music and protected WMA music and converting M4P, M4A, M4B, WMA to MP3, WAV and unprotected WMA.

TuneClone V1.20 allows you to remove DRM protection from purchased music files by applying the virtual CD burning technology. It strips the DRM from protected iTunes M4P or protected WMA so as to help you enjoy DRM-laden music on media players or MP3 players like Microsoft Zune, Sony PSP, BlackBerry, Creative Zen, iriver, SanDisk Sansa, Sony Walkman, Cell Phone (Sony Ericsson, Motorola, Nokia N-series, Samsung Anycall, LG, etc.) Pocket PC, PDA and so on.

TuneClone V1.20 also lets you virtually burn music files with media player software like iTunes, Windows Media Player, RealPlayer, WinAMP, Rhapsody, Napster, etc.

Key features of TuneClone V1.20: http://www.tuneclone.com/

1. TuneClone V1.20 is easy to install and easy to use via a simple user interface.

2. TuneClone V1.20 converts DRM protected music to MP3, WAV and unprotected WMA at very high speed with very nice CD quality.

3. TuneClone V1.20 easily and quickly removes DRM from purchased music files by applying the virtual CD burning technology. Compared with using real CD-R or CD-RW disc, the virtual CD burning uses the maximum writing speed so that your music files can be converted at a very high speed.

4. TuneClone V1.20 supports converting protected music for playback on all kinds of music players like Zune, PSP, BlackBerry, Creative Zen, iriver, Walkman, etc.

5. TuneClone V1.20 enables you to virtually burn music files with iTunes, Windows Media Player, RealPlayer, WinAMP, Rhapsody, Napster, etc.

6. TuneClone V1.20 is specially designed for batch converting large song collections.

7. TuneClone V1.20 well preserves ID3 tags for artist, album, title names, artworks, etc.

8. With TuneClone V1.20, the converted songs will have no DRM restriction any more.

Availability

More information about TuneClone V1.20 is available at http://www.tuneclone.com. You can free download TuneClone V1.20 via http://www.tuneclone.com/tuneclone_setup.exe for a try. The full version of TuneClone V1.20 costs USD 34.95. If you have questions about or show interest in TuneClone V1.20, please feel free to contact its support team via support@tuneclone.com

Monday, September 01, 2008

How to Transfer iTunes M4P to BlackBerry Storm

One of the great new features I am starting to enjoy on my BlackBerry Storm is the ability for it to play multimedia files and specifically audio (music).

And below are the formats supported by BlackBerry Storm:

Video format support: MPEG4 H.263, MPEG4 Part 2 Simple Profile, H.264, WMV
Audio format support: MP3, AAC, AAC+, eAAC+, WMA, WMA ProPlus

However, I bet there are not a few people who'd like to enjoy music songs from iTunes on their BlackBerry Storm. What frustrates them most is the fact that the iTunes tracks they purchased or downloaded from iTunes Store are in a "protected" AAC or M4P audio format and they are unable to play them beyond iTunes environment. The DRM-ed iTunes music songs are not recognized by BlackBerry Storm at all.

Don't give up, anyway! The posts I previously wrote How to convert iTunes M4P to MP3 with TuneClone and How to Convert iTunes M4P to MP3 are right there helping you to get rid of the headache. You can choose either the burn-and-rip method or that of using TuneClone Audio Converter elaborated in the posts.

After you get the output MP3 files (actually you can also output M4P to WAV), you can now begin to transfer them to your BlackBerry Storm:

1. Connect your Blackberry to you computer via the USB cable.
2. If you have properly enabled your Blackberry as a Mass Storage Device, your Blackberry's microSD card will show as a removable drive on your computer. For this guide, it happens to be on "Removable Disk" G:. Double-Click.
3. Double-click on the Blackberry folder
4. Double-click on the music folder
5. The folder should be empty.
6. Copy your music files to your Blackberry. Depending on the size, transfer time may vary.
7. Disconnect your Blackberry from the USB cable and go to the Multimedia icon on you Blackberry. You need to disconnect when you use the Mass Storage device method as it disables direct access from the Blackberry when connected to the PC via the USB cable.
8. Click on the Music icon.
9. Click on the Media Card folder
10. Select your Music folder
11. Select your Song
12. Play your music and enjoy!

Done.

Monday, August 18, 2008

How to transfer iTunes M4P to PSP

It is no doubt PSP is a great game player. But it is also a very good entertainment device which can be used for playing music. Assume you have some songs on your iTunes and are trying to figure out how to put them on your PSP. You copy and paste them in the PSP music folder, however, the PSP doesn't recognize the songs as music at all. So what's wrong? Don't worry! This guide will help you out of the trouble.

The music downloaded from iTunes is under DRM protection. In order to play it on your PSP, you need to strip the DRM off and have the iTunes M4P M4A converted to PSP MP3 format. You can burn the protected M4P music files to CD-R or CD-RW disc to make an audio CD and then use some CD ripper software to convert the audio CD track back to PSP MP3. Also iTunes allows you to burn the protected music files to CD-R or CD-RW disc to make a standard audio CD:

1. Insert a CD-R or CD-RW disc into your CD-ROM drive. You'd better use CD-RW disc as it can be used for more than once.
2. Create a new playlist in iTunes. Add the protected songs to your playlist until you have 72 minutes of music. Click Edit and select Preferences. Select the Advanced tab. Tick the Audio CD option on the Burning tab. Click the Burn Disc button to make an audio CD.
Note: You cannot select the MP3 CD option since it requires the protected music files be converted to unprotected MP3 files.
3. After the audio CD is successfully burned, insert the disc into your CD-ROM drive again. Then you can use iTunes or Windows Media Player to import the music tracks on the burned disc to MP3 files.

Convert iTunes to PSP

Sounds a good idea! But it would be a time consuming process if you have a library of iTunes M4P music files ready to be converted to PSP MP3 for playback on your PSP. And it is a waste of CD discs. Moreover, the information about the M4P music files like title, artist and album will be lost after burning and ripping back to MP3 or WMA files. So this method is not recommended if you have a big collection of iTunes M4P music files ready to be transferred to your PSP.

Here, I would recommend using TuneClone M4P to MP3 Converter to convert iTunes M4P to PSP MP3. It applys the virtual CD burning technology to simulates the burning and ripping process. You just need to burn the iTunes M4P playlist to TuneClone virtual CD burner. Then TuneClone will directly convert the iTunes M4P music list to PSP MP3 for you. It is very fast and the information about each music song will be preserved perfectly. You can follow its the step by step tutorial to learn how to convert iTunes DRM protected M4P music to MP3 for PSP.

Convert iTunes M4P to MP3 for PSP

After getting the output MP3 files by adopting either the burn-and-rip method or the way of using TuneClone M4P to MP3 Converter, now you can begin to transfer the MP3 files to your PSP:

1) Connect the PSP to your PC with a USB cable.
2) Press the "home" button on the PSP (it's a tiny button to the lower left of the screen) then use the left-right directional buttons to find "Settings", then the up-down buttons to find "USB Connection" on the PSP.
3) Press the "X" button (you got it, the round button with the "X" on it) and your PSP should display "USB Connection".
4) In a moment or two your computer should tell you that a new USB device has been connected, then show you a new generic hard drive, usually E: or F:
5) Click on the drive letter that corresponds to the PSP unit.
6) Now create a new folder on that drive and name it "psp".
7) Within the new "psp" folder create another folder, and name it "music".
8) Copy your desired mp3 files into the new "music" folder.
9) When you're done copying your desired music tracks, press the "O" button on the PSP to get out of USB connect mode.

Now you're ready to go! Use the left-right arrows to move to the music area, then the up-down arrows to find "Memory Stick". Choose that folder by pressing the "X" button again, and you should be able to find all your favorite music!

Sunday, August 10, 2008

How to Convert iTunes M4P to MP3 WMA WAV for Windows Movie Maker

Many people are fond of making slideshows on their Windows Movie Maker, however, it won't let them import any purchased music as it is DRM protected. Since iTunes store tops the music retailer in the world, the following tutorial focuses on how to convert purchased iTunes M4P music to MP3, WAV or unprotected WMA so as to import it to Windows Movie Maker project as background music. The tutorial is composed of the following three parts:

Part 1. Something about Windows Movie Maker

Windows Movie Maker is a totally free program that comes with Windows XP Home Edition, Windows XP Media Center Edition, Windows XP Professional, and Windows Vista. Below are the audio/video formats accepted by Windows Movie Maker:

Video files: .asf, .avi, .wmv
Movie files: MPEG1, .mpeg, .mpg, .mlv, .mp2
Audio files: .wav, .snd, .au, .aif, .aifc, .aiff
Windows media files: .asf, .wm, .wma, .wmv
MP3 format audio: .mp3

iTunes M4P to Windows Movie Maker

Part 2. Remove DRM from M4P music

The songs you purchased from iTunes store are under DRM protection. You cannot directly import them to your Windows Movie Maker project. However you can burn the protected music files to CD-R or CD-RW disc to make an audio CD and then use some CD ripper software to convert the audio CD track back to MP3, WAV, WMA, etc. And iTunes allows you to burn the protected music files to CD-R or CD-RW disc to make a standard audio CD:

1. Insert a CD-R or CD-RW disc into your CD-ROM drive. You'd better use CD-RW disc as it can be used for more than once.
2. Burn your playlist to make an audio CD. You cannot select the MP3 CD option since it requires the protected music files be converted to unprotected MP3 files.
3. After the audio CD is successfully burned, insert the disc into your CD-ROM drive again. Then you can use iTunes to import the music tracks on the burned disc to MP3 files.

The steps are very simple indeed. Yet, I'd like to introduce a practical application called TuneClone M4P to MP3 Converter. It applies the virtual CD burning technology so that there is no need to use real disc. You can use it to move your library of M4P DRM protected music to the MP3 format that you can use on any player out there worth its salt. This is a useful tool for anyone looking to break their relationship with the iPod. The best part is that it maintains all of the music file's metadata. Wordpress has a little tutorial showing how to remove DRM from iTunes M4P music with TuneClone M4P to MP3 Converter.

TuneClone Converts M4P to MP3 for Windows Movie Maker

Part 3. Add the output DRM-free music to Windows Movie Maker

After you get the output DRM-free music by adopting either the disc burning/ripping method or virtual CD burning method discussed in Part 2, now you can begin to import it into your Windows Movie Maker project.

Click on "File". Then click on "Import". A window will appear. In the window, navigate to the sound or music file you want to add to your movie. Then double click on the file. You'll see the icon for the file in your Windows Movie Maker "Collections". Click on the icon and drag it on to the timeline to the part of the video you want the sound or music to play.

import iTunes to Windows Movie Maker

Sunday, July 27, 2008

How to share iTunes DRM music with your Facebook friends

Facebook is a social utility that connects people with friends and others who work, study and live around them. People use Facebook to keep up with friends, upload an unlimited number of photos, share links and videos, and learn more about the people they meet.

Facebook offers an application called "Twist me!" to help Facebook fans share music with their friends. Below is the brief steps:

First, visit Facebook website and add the "Twist me!" Application to your profile.

Second, click "Twist me!" from the "Applications" list and click "Next" to import the music files from your local PC. Of course, you can also import videos and images. The supporting formats are various. Here I focus on music. You can add a maximum of 8 audio files here. What's more, you can leave a message to your friends accompanying the music files.

Third, choose your friends to send the music files to.

It is very easy to share music files with your Facebook friends. However, we always have very classic music on our iTunes accounts and are willing to share them with our Facebook friends. Here comes the headache! The music files under the iTune account are DRM protected. So how to remove the DRM from the protected iTunes music files and output them as Facebook supported unprotected music files?

The program called TuneClone I talked about in my previous post How to convert iTunes M4P to MP3 with TuneClone comes to the rescue. It can be used to batch convert DRM protected iTunes M4P music to MP3. This program automatically generates a virtual CD burner for converting the music files. Compared with using real disc, it is much faster. Moreover, this cute program can keep the information about artist, title and album intact. It is a very good application for iTunes users who have hundreds of M4P files ready to be converted and DRM removed.

Tuesday, July 15, 2008

How to convert iTunes M4P to MP3 with TuneClone

TuneClone Audio Converter is the software you are looking for if you have a big collection of iTunes M4P music files to be converted to MP3. It automatically generates a virtual CD drive and simulates the burning and ripping process. All you need to do is install TuneClone and then burn your playlist to TuneClone virtual CD burner. And TuneClone will directly convert the iTunes M4P music to MP3. It is very fast and all the music information about artist, album and title will be preserved perfectly.

Note: If you are using iTunes 8.0 or above, please skip to http://itunestomp3.blogspot.com/2008/09/updated-how-to-convert-itunes-protected.html

1. Download TuneClone from http://www.tuneclone.com and install it.

TuneClone Audio Converter is fully compatible with Windows XP and Vista. A virtual CD Burner will be installed. This virtual CD-RW will be used to convert music files.

2. Set the default CD Burner to TuneClon CD-RW at iTunes.

Click menu "Edit", select menu item "Preferences...", and then select "Advanced" tab. In order to keep the music metadata, the "Include CD Text" option should be checked.

iTunes M4P to MP3

3. Create a playlist, and then add the files you want to convert into the playlist.

4. Click Burn Disc button at the bottom right of the main screen of iTunes.

iTunes M4P to MP3

While the burning gets started, TuneClone will automatically convert the music file to MP3. You can open the manager screen to show all the converted music files.

Convert iTunes M4P to MP3

The most important step is to choose the cd burner. Then TuneClone will convert the music files automatically. It is exceedingly easy when you want to batch convert lots of M4P files.